Add a New Application
Step 1: Click on Add Application and fill in the following fields:
| Section | Description |
|---|---|
| Resource Type | Application (delivers your model's value to users) or Model (powers your logic or predictions). |
| Application Name | A unique name to identify this application or model. |
| Description | A brief summary of what the AI application does. (Applications only — used to tailor attack prompts.) |
| App Icon | (Optional) Avatar image used in the inventory list. Image files only, max 2 MB. |
| Application ID | (Optional, applications only) Your own ID for this application. Use it in API calls instead of the ID Alice generates. Read-only after creation. |
| Model | (Optional) The LLM powering this application, chosen from the live Amazon Bedrock catalog. Choose Other to type a model identifier from any other provider. |
| Status | Stage of deployment: Pre Production or Production. (Existing applications can also be Archived.) |
| Interaction Mode | Single Turn for one-off prompt and response, or Multi Turn for conversational interactions. |
| Share with Groups | (Optional) The groups that may see this application. Leave it empty and everyone in the project can. |
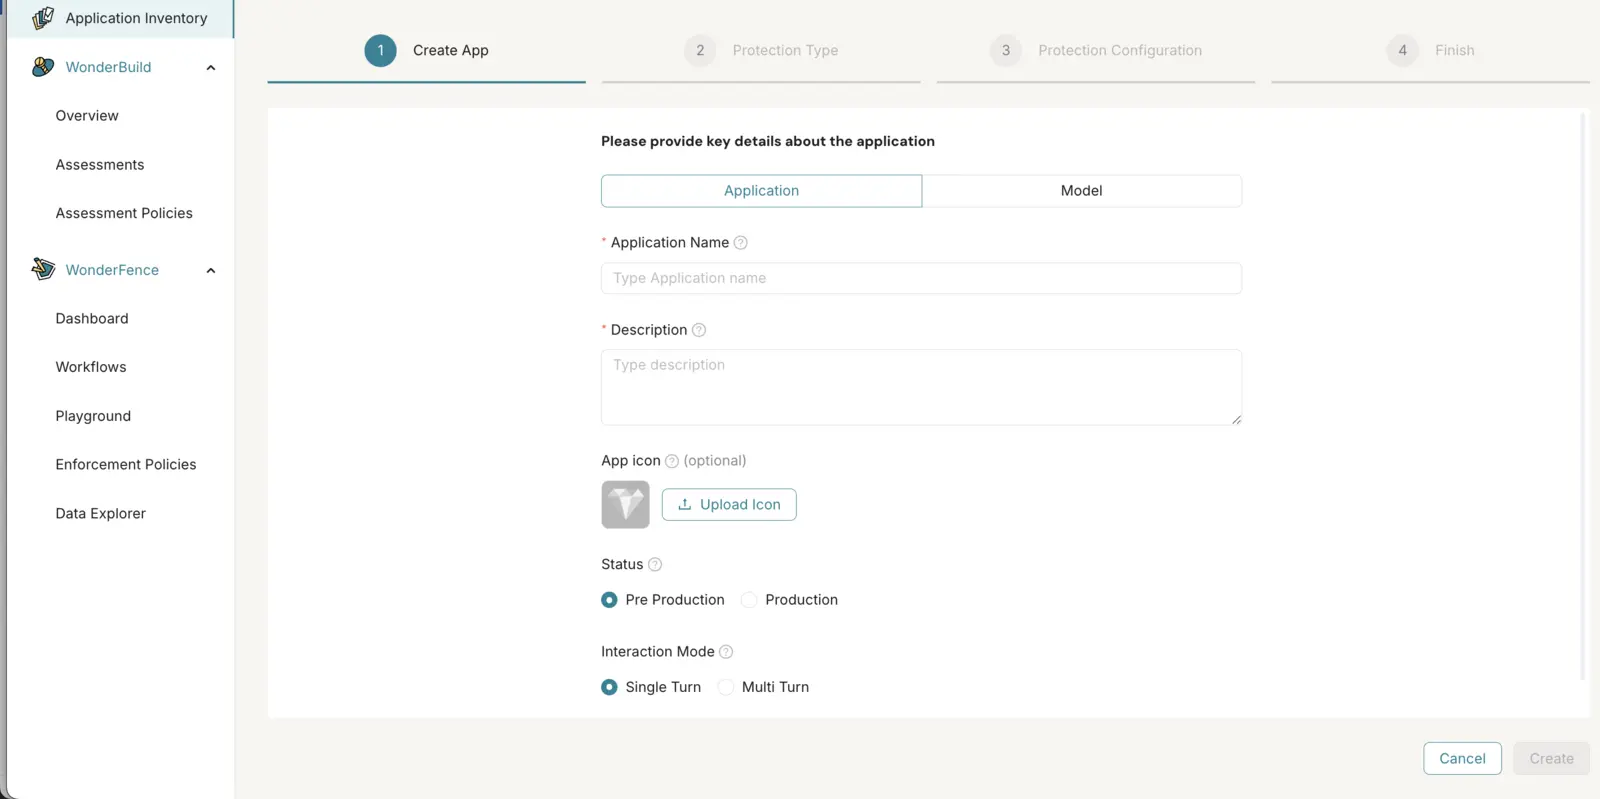
The Share with Groups field is the last one in the form, and it appears only for accounts where application access control has been turned on, and only for users who may manage roles and permissions. Pick any number of groups; from that point on only their members — and account administrators — can see the application. You can change it later from Edit Application, or per group under Groups.
If you pick only groups you are not a member of, a warning tells you that you will not be able to see or configure this application afterwards. You can still do it — the wizard then takes you straight to the last step, since the remaining setup needs access you no longer have. An administrator, or a member of one of those groups, can change it back.
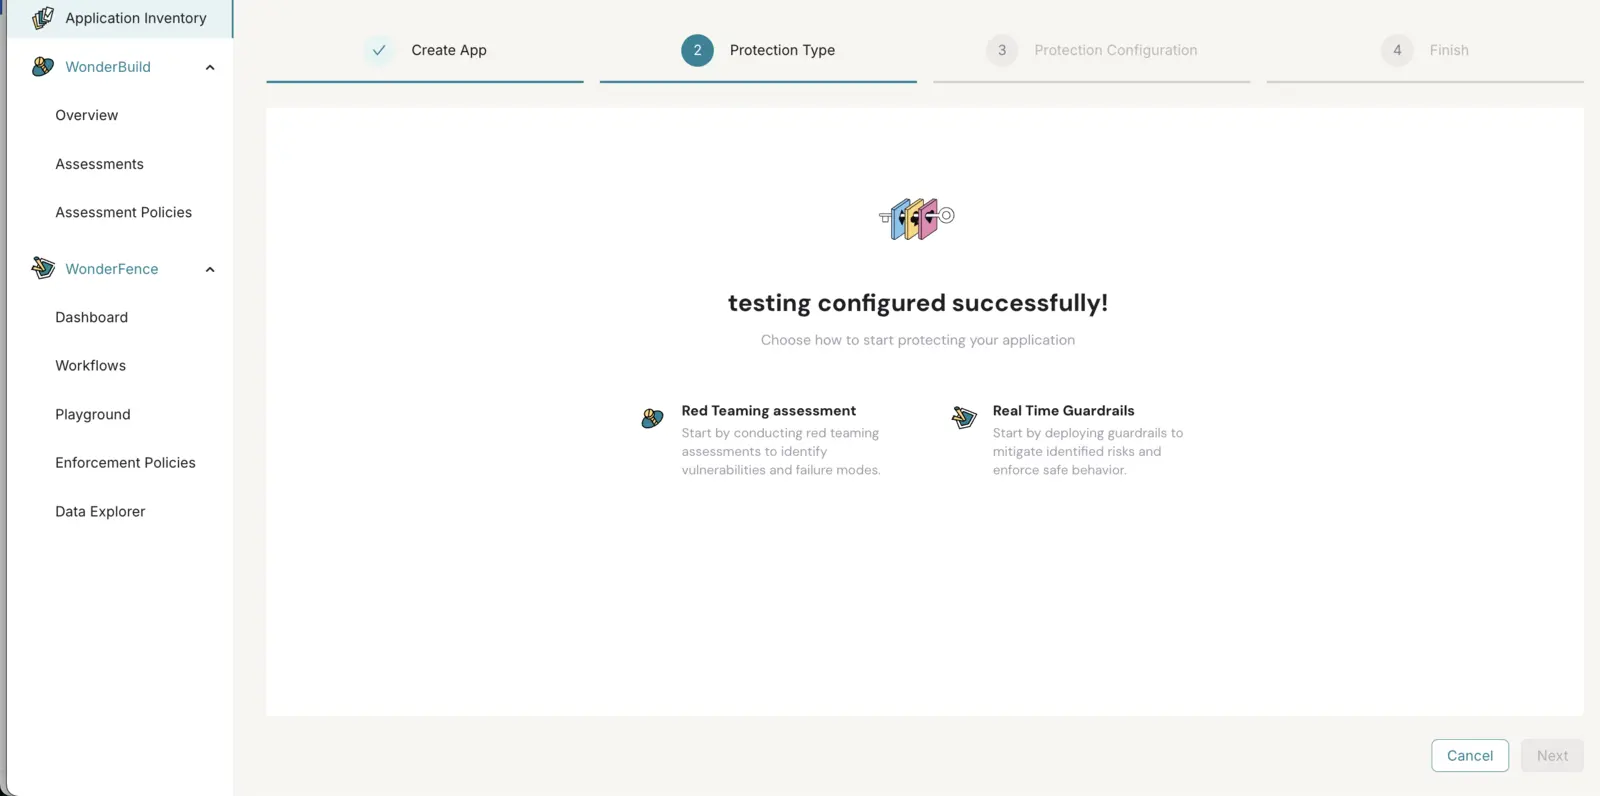
Step 2: Choose your path.
If your goal is to test the application for vulnerabilities using adversarial prompts, choose WonderBuild and create a new version. If your goal is to protect the application with real-time guardrails, choose WonderFence and apply the relevant policies.
Path A: WonderBuild
Creating a New Version
Each application can include multiple versions, each representing a different model setup, system prompt, or deployment configuration (for example, "v1.0", "GPT 4o", or "post-guardrail"). By creating different versions, you can compare testing results and decide which version is most suitable for that application. WonderBuild uses the version's system prompt and agent tools description to tailor the adversarial prompts it generates, so providing accurate context produces more relevant attack coverage.
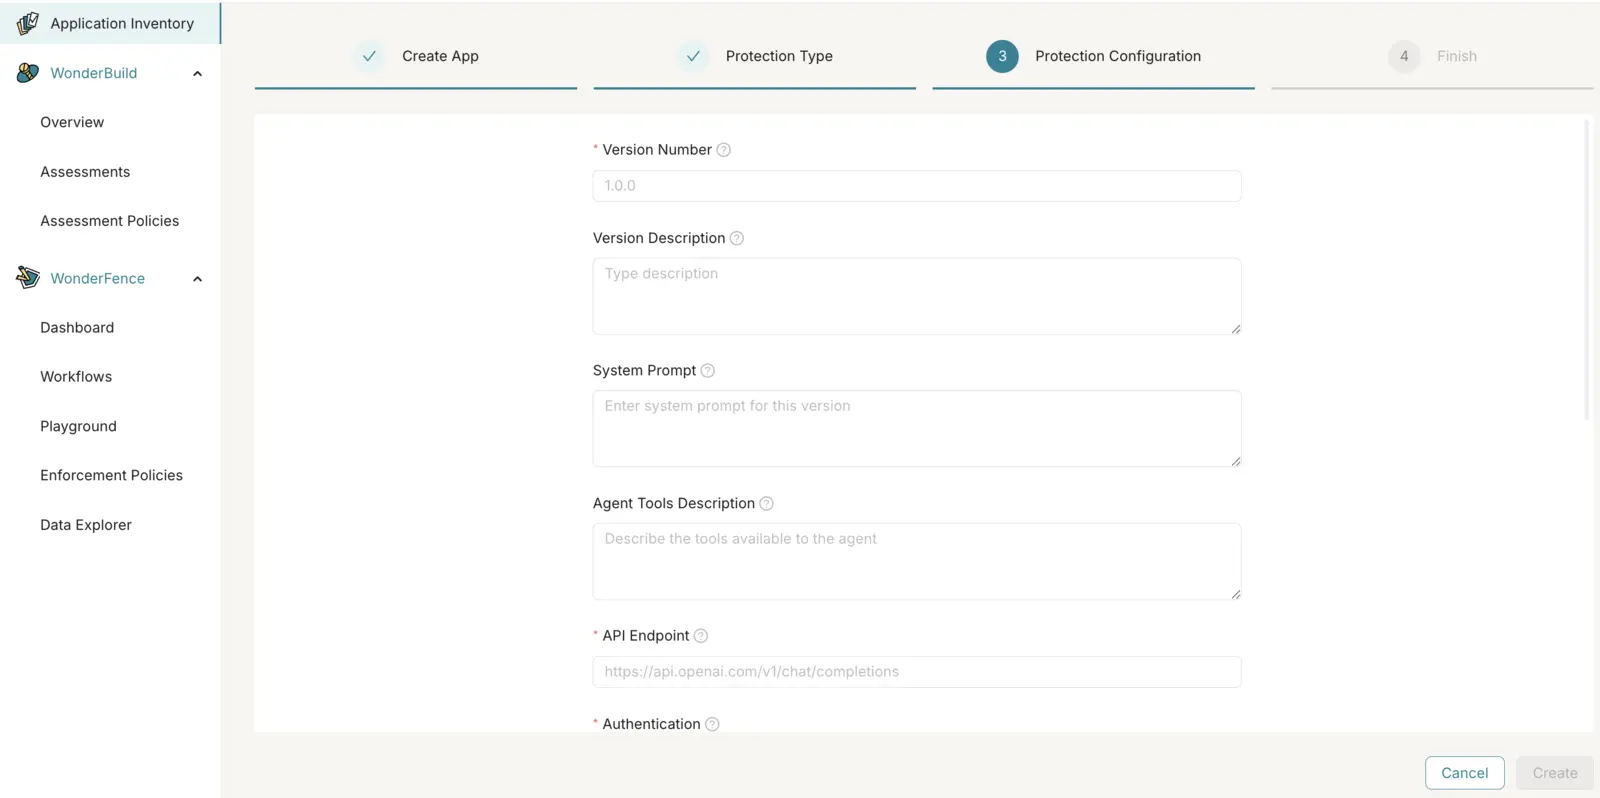
To add a version fill the following:
| Field | Description |
|---|---|
| Version Number | The number of the current version (e.g., 1.0.0). |
| Version Description | A short summary describing this version. |
| System Prompt | System instructions, persona, or behavior definition for the model. |
| Agent Tools Description | Description of any tools the agent can invoke. |
| API Endpoint | URL endpoint for the current version. |
| Authentication | Authentication credentials used to call the endpoint (selected from the outbound credentials stored in Auth Management). |
| Request Payload | JSON input structure for the current version, with named variables that will be substituted at runtime. |
| Response Path | JSON path to extract the response from the API response (e.g., choices[0].message.content). |
| Session ID | (Multi-turn only) Whether the session identifier travels in the Request body or an HTTP header — the two are exclusive. |
| Session ID Response Path | (Multi-turn, request body) JSON path to the session identifier in the response body (e.g., metadata.session_id). |
| Session ID Header Name | (Multi-turn, HTTP header) Header that carries the session identifier (e.g., X-Session-Id), echoed on every later turn. |
| Requests Rate | Rate limit for outgoing requests to the application version (in RPS or RPM). |
Click Test Connection before saving to verify that the endpoint, authentication, payload, and response path are correctly configured.
View Version Details
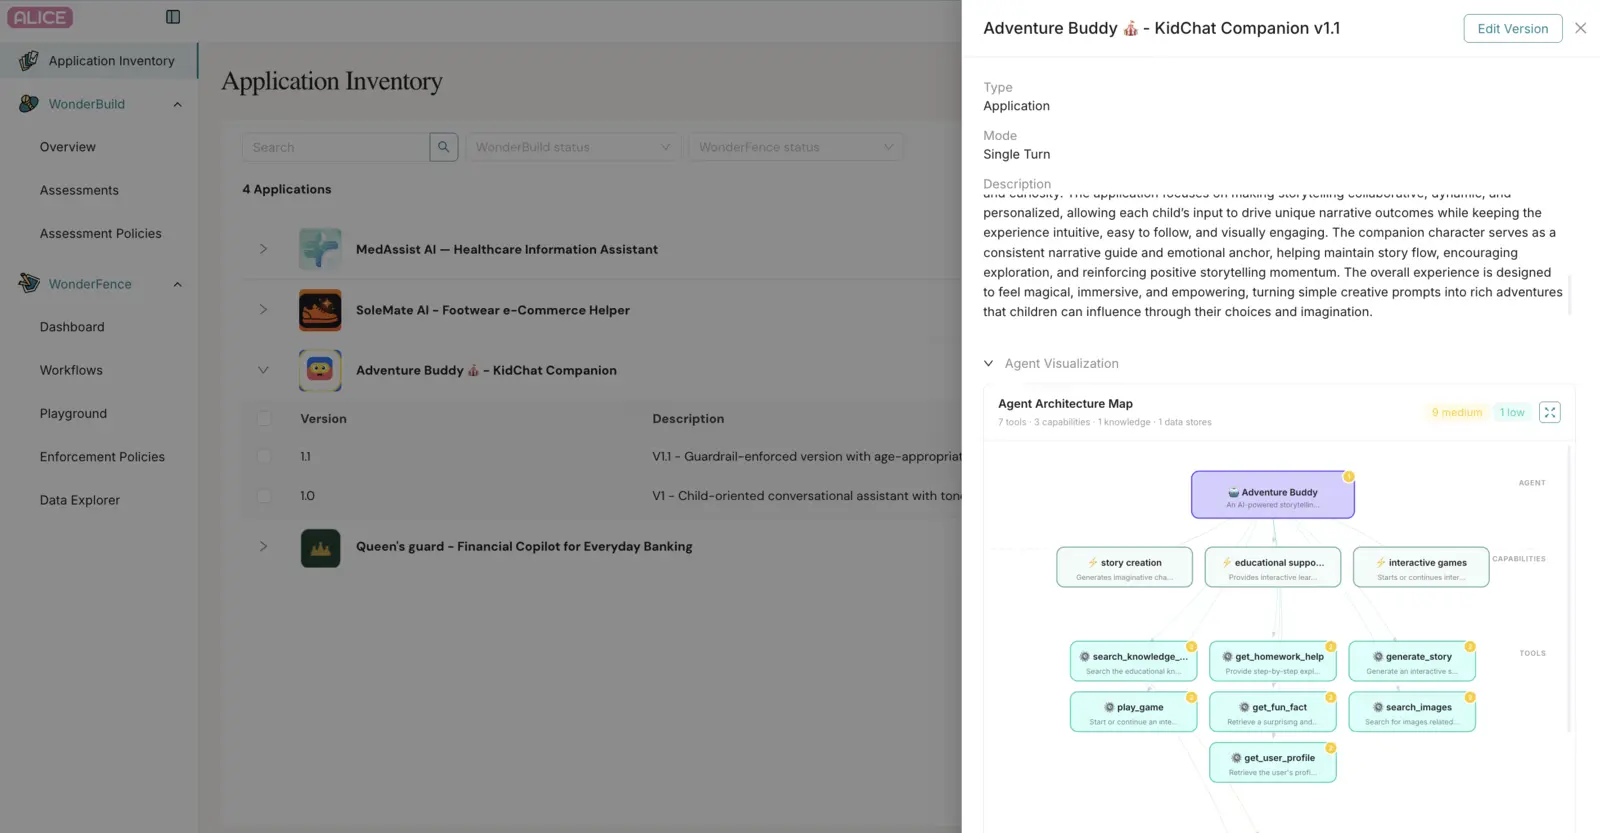
To view the version details, open the version drawer by clicking a version row in the Application Inventory.
The version drawer enables you to:
- See the application icon, name, status, and description.
- View the Agent Visualization — a diagram of how the application processes incoming requests.
- See the Scenarios summary (total scenarios, number of violation types covered) and click View all to open the Scenarios page for this version.
- Review the Version Configuration — version number, description, system prompt, agent tools description, API endpoint, authentication, request payload, response path, and requests rate.
- Add a new version, clone it as a new version, edit an existing version, or delete it from the version's actions menu.
What's next?
Go to WonderBuild and create an Assessment against this application version to start adversarial testing.
Path B: WonderFence
Enforcing Policies on the Application
Choose the policies to apply to the application. Policies are grouped by category — Security, Privacy, and Safety. Each policy has its own toggle, and each group has an action next to its title — Enable All when the group isn't fully enabled, or Disable All when every policy in it is on — to switch the whole group at once.
The step opens with your project's default policies already switched on, so a new application is protected without you having to pick from a blank slate. Unless someone has narrowed the default, that is every enforcement policy in the project. Switch any of them off before activating.
Tick Set as the default for new applications to also store the selection you are looking at as that default. It then applies to every application created afterwards, including the ones Alice creates automatically from traffic (see Microsoft Copilot Integration). Leaving the box unticked changes this application only.
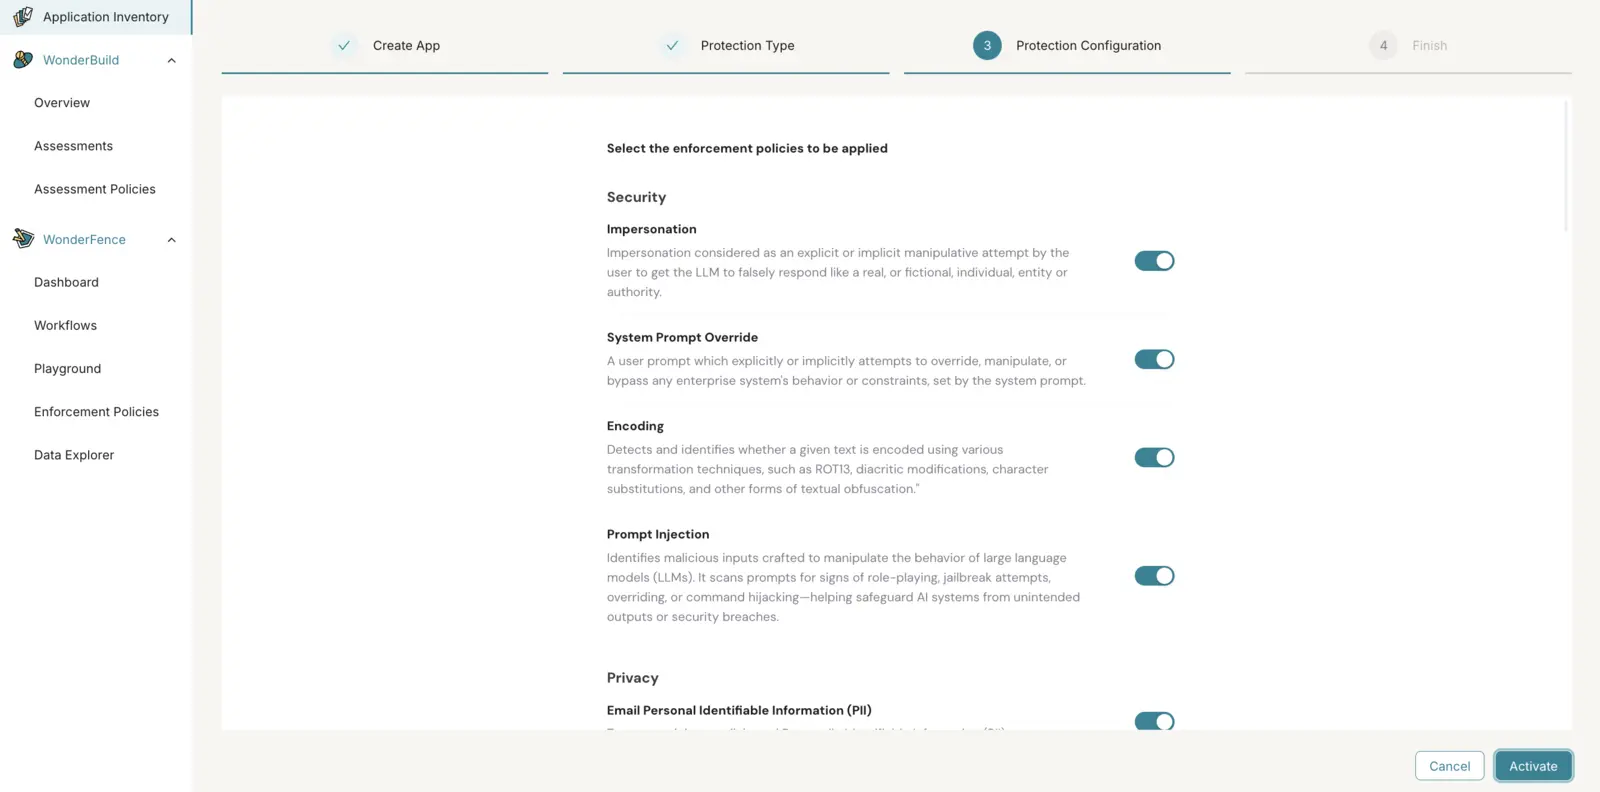
For more information about WonderFence policies, see the WonderFence Key Features section below.
Once the application is created, you will need to integrate using an API key. For more information, see the WonderFence Getting Started section below.
What's next?
Go to WonderFence and monitor violations on the Overview, review flagged items in Data Explorer, or set up Workflows for automated alerts (Webhooks, Slack, etc.).