Assessment Policies
The Assessment Policies page is the centralized interface for managing the assessment policies used during WonderBuild assessments. Each policy is tagged with a Type — Safety, Privacy, or Security — and is either a built-in System policy provided by Alice or a Custom policy you create.
You can:
- Search for a specific policy by name.
- Filter policies by Type (policy group) and by source (System or Custom).
- Switch between a list view and a card view using the view toggle above the policies; your choice is remembered for next time.
- Create a new custom policy.
- View the read-only details of any policy.
- Edit, duplicate, or delete your custom policies. System policies can be duplicated to create an editable copy.
Create a policy:
Clicking Create Policy opens a full-page, two-step wizard: Create Policy followed by Train Policy. Step 1 collects the policy details and your examples:
| Field | Description |
|---|---|
| Policy Name | A concise name representing the policy. |
| Type | The policy group the policy belongs to. Required — choose Safety, Privacy, or Security. |
| Policy Guidelines | Specific guidelines or criteria that define what constitutes a violation of this policy. Must be at least 100 characters — a live character counter under the field shows your progress toward the minimum. Use Upload from File to populate the guidelines from a .txt or .pdf file. |
| Benign Examples | Exactly 5 example messages that represent acceptable, non-violating behavior. See Entering your examples below. |
| Violative Examples | Exactly 5 example messages that violate this policy. See Entering your examples below. |
Entering your examples:
Each set of examples is a deck of 5 cards that you fill in one at a time. The cards still to come are stacked behind the one you are writing in, and the counter under the deck (for example, 2/5) shows where you are. Next becomes available once the current card has text, and Previous takes you back to review or edit an earlier card — nothing you have typed is lost as you move between them.
Instead of typing all 5, you can use Upload from File to import them from a .csv, .xlsx, or .tsv file. The first column of the file is used, a header row such as "example" or "prompt" is ignored, and the imported values replace the whole deck and return you to the first card. Files with fewer than 5 examples leave the remaining cards blank for you to complete; anything beyond the first 5 is ignored.
Once the details and examples are valid, Next advances to Train Policy. Arriving there starts the work of drafting your policy and generating candidate prompts for it, which takes about a minute; the step shows what it is doing and then counts the prompts off as they are labelled. If that work cannot be completed, the step says so and offers Try again — nothing has been created at that point, and you can also go back to adjust the details and start over.
Once they are ready, the system asks "Do you agree with each verdict about the following responses?" and shows you a round of them, each with the verdict it proposed — Verdict: Benign or Verdict: Violative — below the text. Confirm (👍) or reject (👎) each one to teach the policy. Longer responses are shortened to two lines with a Show More link that expands them in place. The number generated is decided per policy, so the rounds are not always the same size.
Training runs as a short sequence of rounds, and the round you are on is shown above the list as Round 1 of 2. Each round is built from the one before it: when you have judged every response in a round, Next folds your verdicts into the policy and generates a fresh round against the improved version, which takes about a minute. The step tells you what it is doing while it works and counts the responses off as they are labelled, and Next stays unavailable until that finishes. On the final round the button becomes Create instead.
Rejecting opens a small floating box where you can say what the verdict got wrong. The note is optional — the rejection counts either way, and you can close the box with Done or by clicking anywhere outside it. What you type is kept as you type it, so nothing is lost when the box closes. Once written, the note is shown under the verdict as Your note:, and clicking 👎 again reopens the box so you can change it. Switching that response back to 👍 clears the note. After you review every round, the Create button is enabled and creating the policy returns you to the catalog.
As on the WonderFence wizard, your verdicts are used to rewrite the policy itself, so the guidelines saved on the created policy are a fuller version of what you wrote on step 1, expanded with the criteria your confirmations and rejections established. If that rewrite cannot be completed, the policy is still created, keeping the guidelines exactly as you typed them.
The Type field is shown only when creating a policy, where it is required — you must choose Safety, Privacy, or Security. When editing or duplicating a policy, the Type is not shown and stays as originally set. Duplicating pre-fills the name as Copy Of <source policy>, which you can rename to anything you like, and pre-fills the source's guidelines — you must edit the guidelines before the copy can be saved, so each copy is meaningfully distinct.
To open a read-only view of a policy's name, type, and guidelines, click anywhere on its row, or use the row actions menu (⋮) and choose View Details. This is available for both System and Custom policies. When viewing one of your own Custom policies, the details view also offers an Edit Policy button that switches it into edit mode in place.
→ Go to Assessment Policies page
First Assessment Walkthrough
Step 1 — Register Your Application or Model
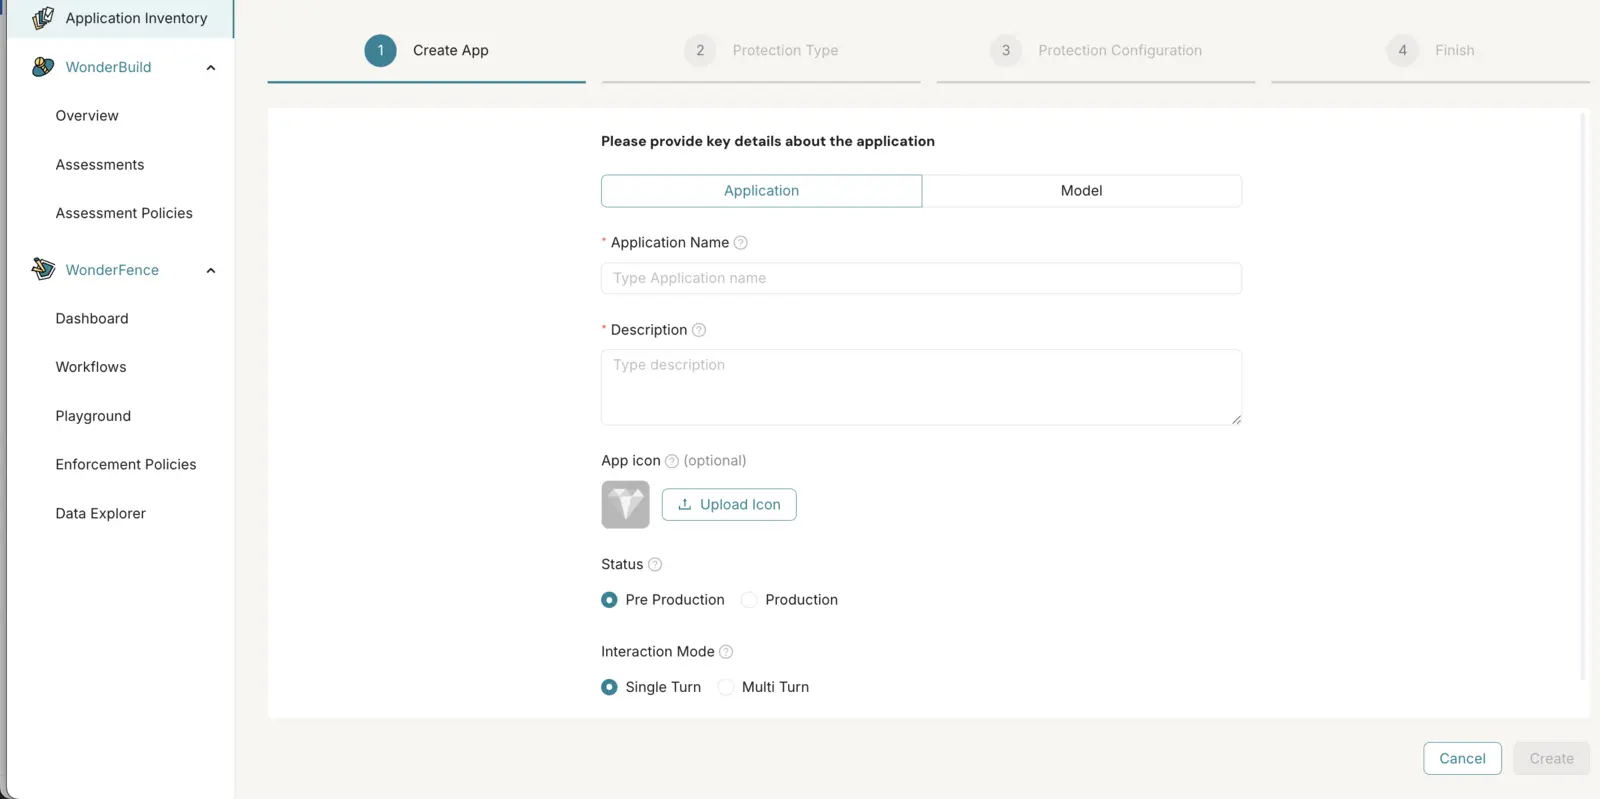
From the Application Inventory page, click Add Application and fill in the application details (Resource Type, Name, Description, Status, Interaction Mode). See Application Inventory for the full field reference.
Step 2 — Configure a Version
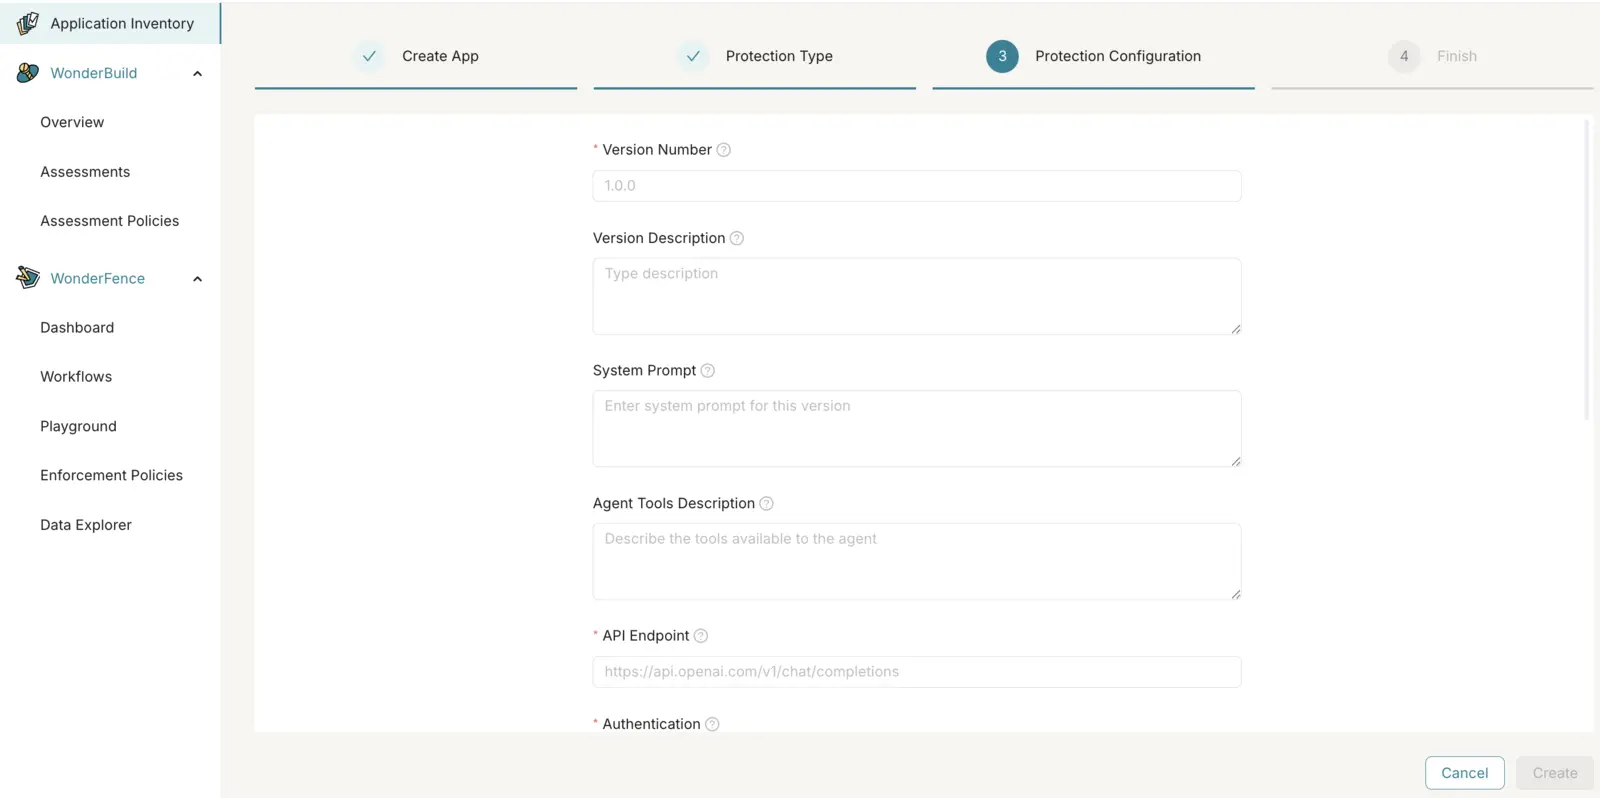
During application creation, choose the red-teaming option and configure the first version: Version Number, Version Description, System Prompt, Agent Tools Description, API Endpoint, Authentication, Request Payload, Response Path, and Requests Rate. Use Test Connection to verify the endpoint before proceeding. See Creating a New Version for the full field reference.
Step 3 — Create an Assessment
-
Navigate to the Assessments page and click + New Assessment.
-
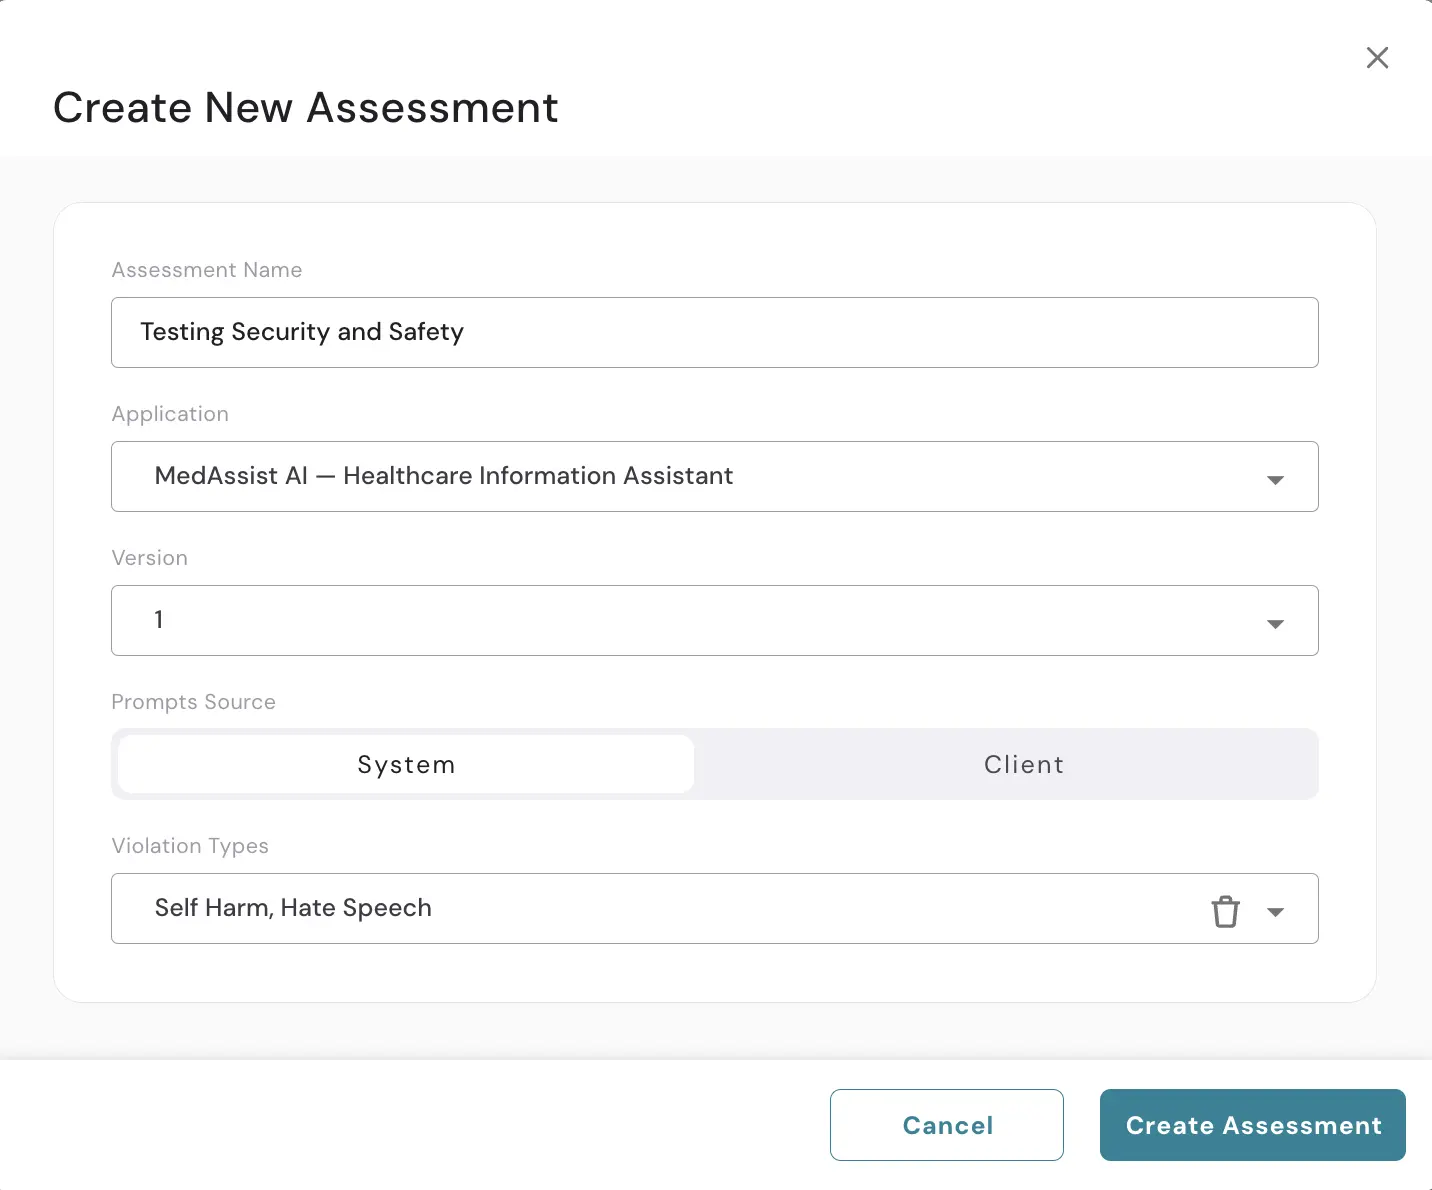
Configure the assessment:
-
Assessment Name — A descriptive name.
-
Application — The application you registered.
-
Version — The version to test.
-
Prompts Source — System to let WonderBuild generate prompts, or Client to upload your own CSV.
-
Advanced → Assessment Mode — Optional. Expand Advanced to pick how deeply the run probes the application: Direct Assessment (plain attack scenarios), Enhanced Assessment (adds obfuscation and evasion techniques), or Adaptive Assessment (iteratively selects and sequences scenarios to hunt for unknown weaknesses). Nothing is preselected — leave it empty to run without a mode, or start with Direct and fix what it finds before moving on. The section appears only when Prompts Source is System — the mode does not apply to prompts you upload yourself.
-
Policies — If using system-generated prompts, select the policies to test. The list is grouped by category (Security, Privacy, Safety), with each policy's duplicates listed directly beneath it. Custom policies you created appear with a Custom: prefix. You can pick any combination of policies, or choose an Industry Preset at the top of the list to add a curated bundle in one step. Any policy duplicated from another (system or custom) shows a gray Copied from … note identifying its source. When you select a system policy, its duplicates become unavailable to select (so you don't test the same policy twice) — hovering a blocked duplicate explains why.
The Over Enforcement policy is the one exception to "any combination". It measures over-refusal rather than successful attacks and produces a different report, so it runs on its own: select it (or any copy of it) and every other policy is grayed out; select a regular policy first and Over Enforcement and its copies are grayed out instead. A note under the field explains which way the list is currently locked. To switch, clear the current selection.
-
-
Click Create Assessment.
Step 4 — Run the Assessment
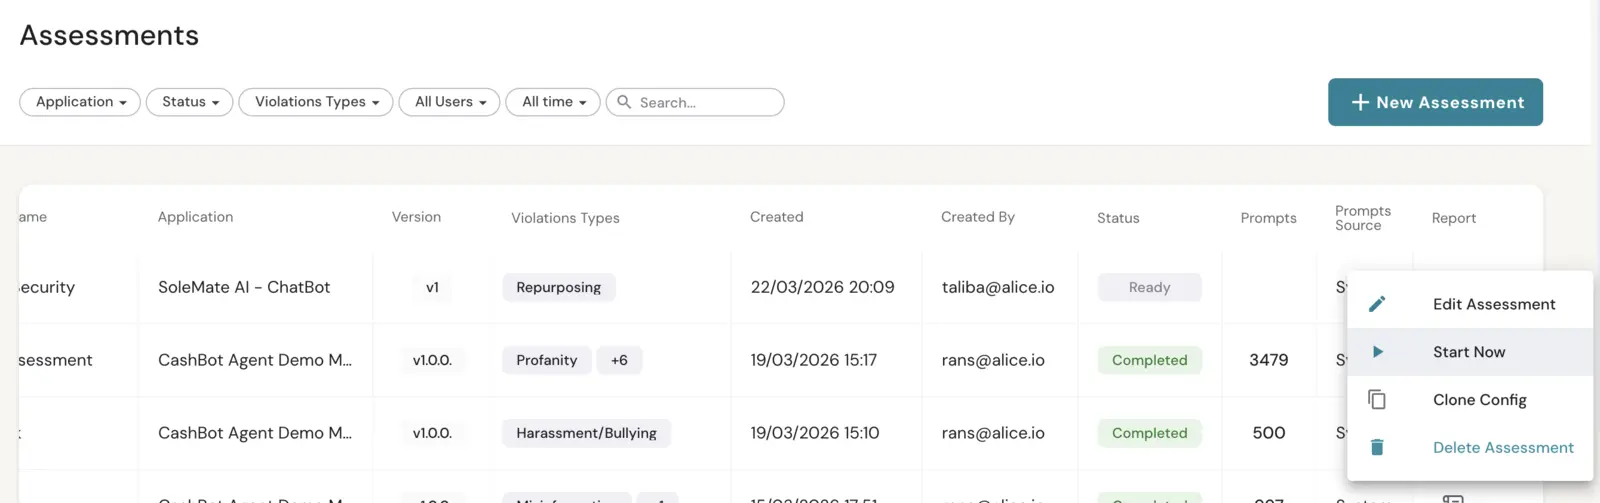
Open the row's three-dot menu and click Start Assessment. WonderBuild will:
- Generate prompts based on your selected policies and your application's context.
- Send prompts to your application endpoint, respecting rate limits.
- Evaluate responses to determine if each one is safe or unsafe.
- Generate a report with findings, metrics, and recommendations.
Monitor progress from the Assessments list, where the status column shows real-time progress through each stage:
| Status | Meaning |
|---|---|
| Ready | Assessment is configured and ready to start. |
| Pending | Assessment is queued for processing. |
| In Progress | Prompts are being sent and evaluated. |
| Generating Report | All prompts processed; the report is being compiled. |
| Gathering Insights | Findings and recommendations are being finalized. |
| Completed | Assessment finished; the report is available. |
| Partially Completed | Assessment finished, but one or more policies failed or timed out. The report is available and covers only the policies that were assessed. |
| Failed | An error occurred during processing. |
| Canceled | Assessment was manually canceled. |
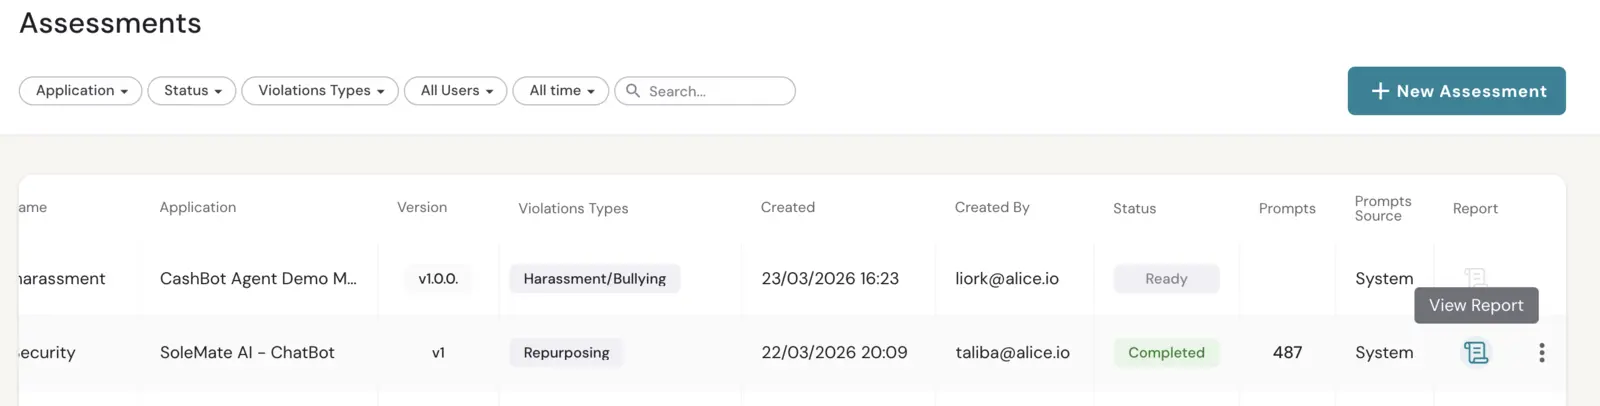
When an assessment is Partially Completed, hover the status chip to see how many policies were not assessed and which ones. The same policies are marked (not assessed) in the Policies column, so you can tell at a glance what the report is missing.

Step 5 — Review the Report
Once the status shows Completed, click the report icon to open the assessment report. See Reviewing Results below.
If the status shows Partially Completed, the report still opens, but a banner at the top states how many policies it covers and names the ones that were not assessed — read the findings as covering only those policies. To fill the gap, use Run Failed Policies from the row's three-dot menu.